At Nostell Priory, the Top Hall was once intended to be much more Neo-Classic in design. The architect, Robert Adam, was working with owner Rowland Winn on the room when Winn died suddenly and work stopped.
Now, 200+ years later, National Trust curators at Nostell Priory were looking for someone who could create a 2D image to show what the Top Hall was intended to look like had it been completed and I was commissioned for the work. The image was to be displayed on an iPad in the Hall and provided to guests by a room attendant.

The Top Hall as it stands today

The changes required were:
1) the removal of the piano and other modern fixtures from the room (not possible to do physically before taking photos)
2) changing the floor from wood to patterned marble
3) changing the paint colour of the wall features
4) adding painted motifs to the walls
5) adding romanesque statues
6) changing the colour of Chippendale furniture and adding them to the room
I first completed a photogrammetric survey of the room (took hundreds of photos of each wall from different angles). I did the same for one of the Chippendale chairs which was to be modified digitally and replaced into the room. With these photos, using Agisoft Photoscan (now called Metashape), I was able to create 3D digital models of the room and the chair. Though I didn’t use the model of the room in the final image, it allowed me to get the right dimensions and lighting for the floor that I was to reconstruct in 3DS Max.

Wireframe of the room model in 3DS Max
To create the floor, I was given an architectural sketch by Adam which was only partially coloured in to indicate what the final product would look like. Using AutoCAD to trace this pattern and 3DS Max to texture, I was able to recreate the patterned marble floor intended by Adam. Then, with my room model and sun modifier, I was able to get the right light fall and reflection on the floor. Rendering images from the same angle as the photos I was working with, I then took these to Photoshop where I removed the wood floor and added in the new one. This, of course, took a lot of trial an error, but ended up looking quite convincing in the end.
Model of the room, casting the proper lighting and reflections on the floor
Statues were done similarly, though the 3D models were sourced rather than built specifically for this project. Placing them in the model room and rendering 2D images with the correct lighting, I was able to convincingly place these in the 2D image in Photoshop.
The chairs were the trickiest part as the 3D model just wasn’t coming out as well as I’d hoped. But with great amounts of Photoshop work, I was able to finally get them placed into the room.
All of the other tasks were completed in Photoshop. The wall paintings were provided by the curator.
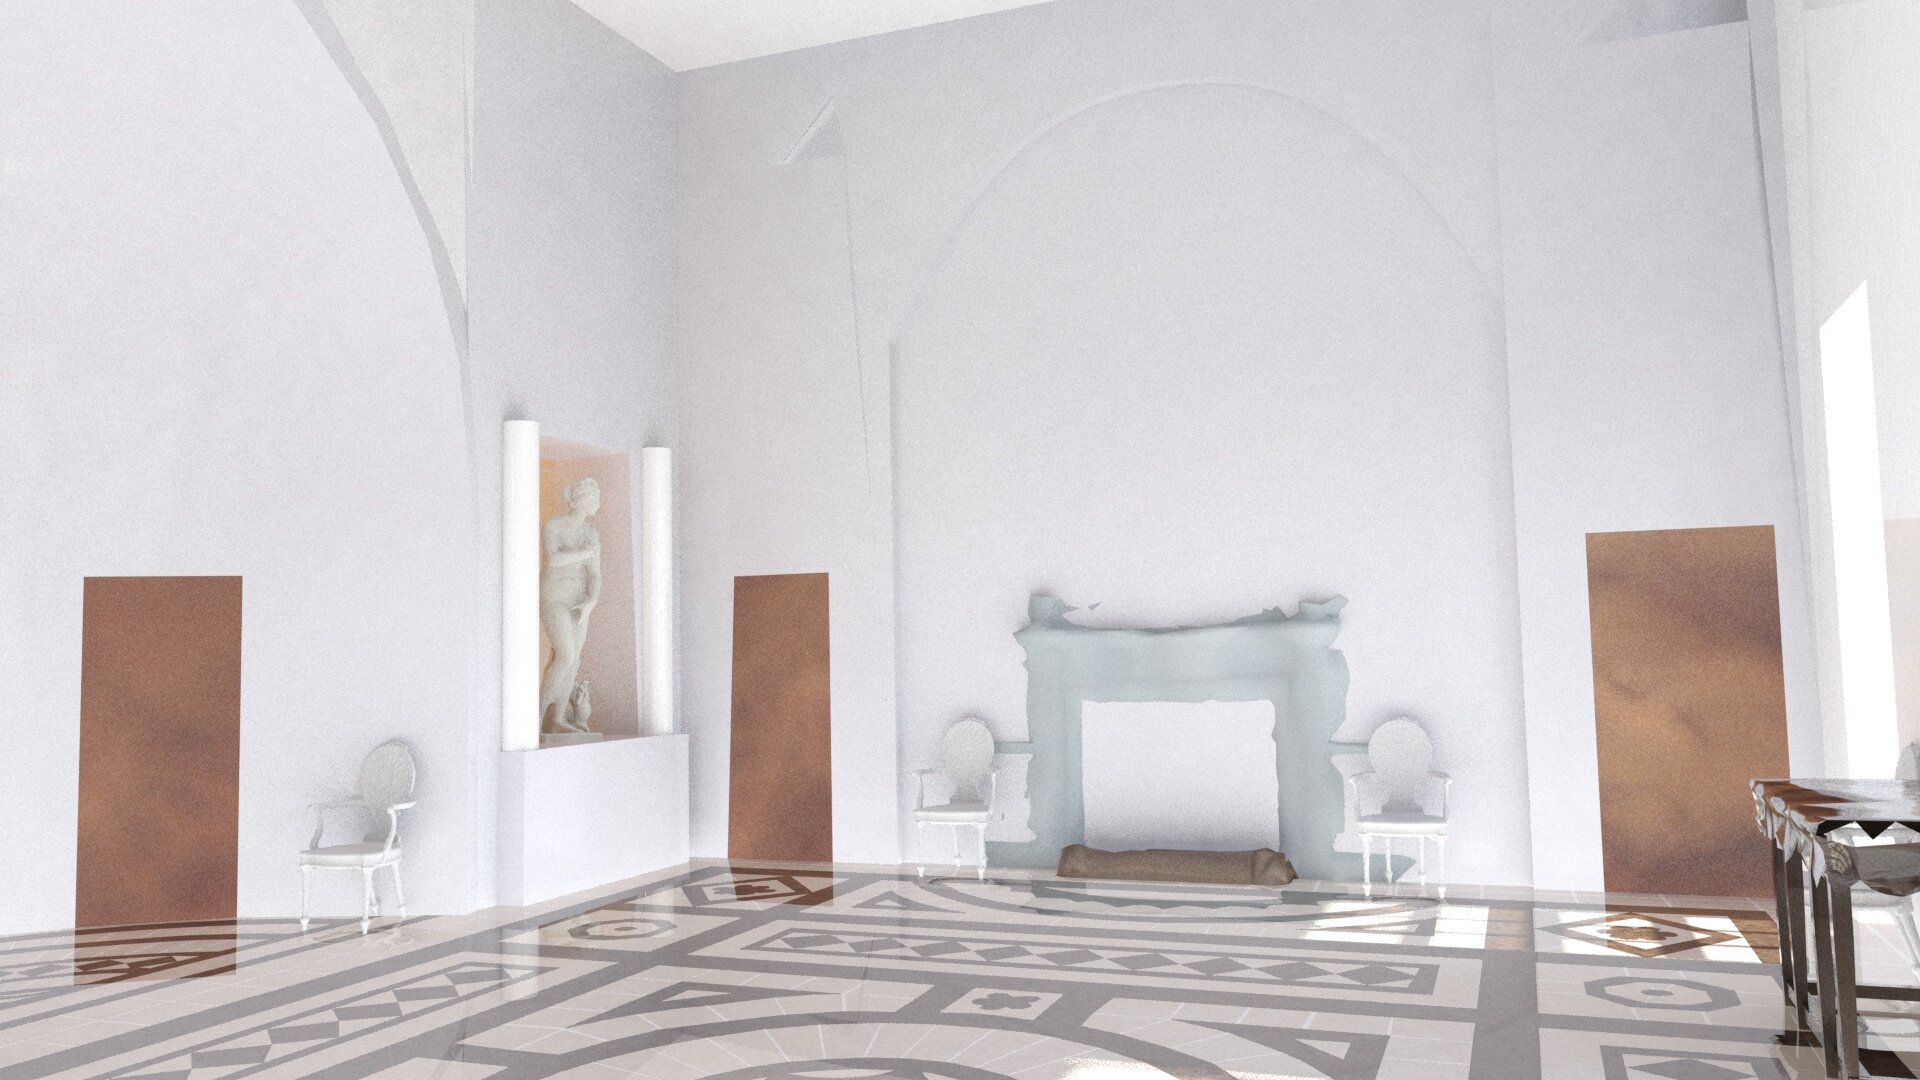
They sought two images looking in two different directions as to provide the most coverage of the room. Below are the before and afters of these modified images.

Original, angle 1

Altered, angle 1

Original, angle 2

Altered, angle 2
