
David lining up the shot for one of the doors.
We recently had the amazing opportunity to work with the National Trust at Nostell Priory for the second time. The project was to create a digital model and animation of their restored 18th century dollhouse.
When deciding on a modeling technique, we chose photogrammetry over modeling-from-scratch because of the level of detail afforded by the former method. We held a one-day photoshoot at Nostell capturing every accessible angle of the dollhouse. The doors were separate objects and these needed to be captured from every angle as well.
It was predetermined that we would not attempt to capture the backs of the dollhouse and doors. The storyboard at this time did not require them and this would cut down on time. It would have been impossible to do so in any case. The dollhouse was huge and immobile, making the back and the roof largely inaccessible. The fragile nature of the doors required a curator to move them from their positions leaning against the wall. Though it worked in this case, it raises a question for future situations where a 360 view may be required of a large, fragile object.

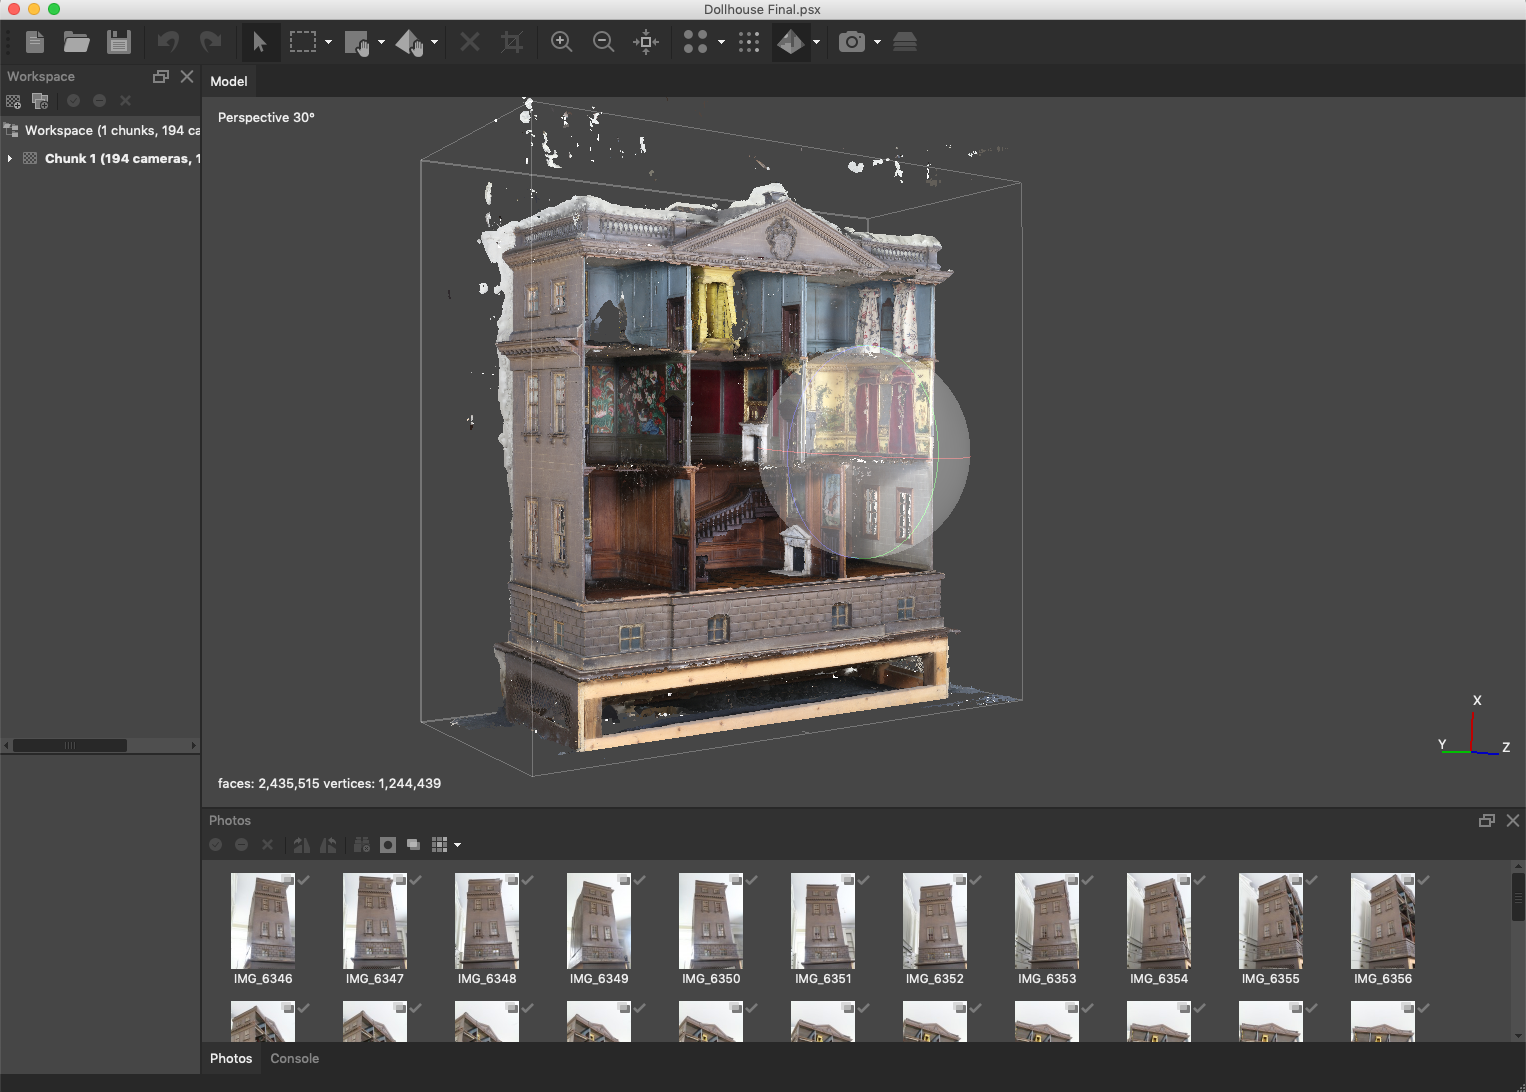
The dollhouse after running through the Metashape processing steps.
I processed the 300 photos we captured using Agisoft Metashape. This required masking out the background on each individual photo and then running the step-by-step program of the software. This process can take anywhere from hours to days depending on the size of the project. Rarely is the final output something that can be used without further tweaking and ours required a lot of cleaning.
Some of this cleaning could be done in Metashape, but I preferred working in the free software Meshmixer. Here, I was able to delete a lot of the mesh that I didn’t need for the final model and fix some of the holes that had been created by the Metashape process.
Meshmixer also allowed me to reduce the polycount of the model which helped immensely later when I moved it to 3DS Max for final processing and animation. The process of photogrammetry creates a model made up of thousands of vertices, lines, faces and polygons (the number of polygons is the polycount). A higher polycount means more detail but can dramatically slow down or even crash the software. This was one reason I decided to remove the interior of the dollhouse, knowing I was going to cover it with a 2D image later on.
Processing through Metashape also creates what’s called the texture, or the detailed image placed onto the model making it look more realistic. For instance, you can see the wood-like texture in the picture to the right versus the internal, non-textured part of

The shell of the dollhouse after working it in Meshmixer

In 3DS Max, you can see all the vertices and edges that make up the models. Notice how they are more condensed around detailed areas like ledges and windows.
the model that appears pink in Meshmixer. This feature is a main strength of using photogrammetry, as the texture can appear nearly picture-perfect. However, it presents challenges when cleaning up the model’s mesh. It will only work when placed over the exact shape of the model that was created with it in Metashape, so modification to the mesh (or those building-blocks of the model discussed earlier) can mess up the texture and leave it looking stretched or just wacky if you don’t do it right. Meshmixer has a feature to repair holes and fakes the texture using the texture around it. However, with texture of such detail, this doesn’t work well. Therefore, I left a few holes to fix in 3DS Max where I could manipulate individual vertices (not a feature available in Meshmixer or Metashape).
In 3DS Max, I faced the challenge of moving and deleting individual vertices in order to fill in blank areas where I needed there to be mesh. For the most part, this was the best way to fill in gaps while getting a decent-looking texture over the area. For certain unrepairable areas, like with some of the windows on the house, I was able to clone good sections and patch them over the bad.
I recreated the backs of the house and the doors, as well as most of the roof, with simple (low-poly) models in 3DS Max and textured them with separate textures. Because the interior would only be seen straight-on and without movement, I was able to place a simple plane with a 2D image of the interior at the front of the shell of the house to deceive the eye and make it appear as if the interior were really a part of the model.

My setup while working in 3DS Max. The kind of work you can do while watching guilty-pleasure tv shows

Final renders of the dollhouse model
As a perfectionist, if I had more time, there are a million things I would fix. However, I’m happy with the final results.
The final animation includes a full rotation of the house with the doors closed. Then the doors slide open and then closed again. Finally, it pans into the little door which opens to reveal the butler waiting to greet you.
The final digital animation will serve as the opener and ending to a slideshow/video created to enhance the dollhouse exhibit. The Miniature Worlds exhibit opened on 7 March 2020 at Nostell Priory.
Check out more about this cool project here.
